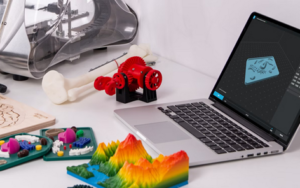
Calibrating a 3D Printer
Calibrating a 3D Printer
One of the learning curves you will have to get around when you start working with a 3D printer is ensuring that all your machine’s motors have been calibrated accurately. On the upside, for calibrating a 3D printer, once you have figured out how to one motor you can apply that knowledge to all the other motors on the machine as well. To fine tune your machine, you are going to need a few items. Gather up a 3D printer (obviously), the software for the 3D printer and a pair of digital calipers. You may also want a pen and paper in case you want to write anything down and you will need to know how to modify your machine’s firmware.
First time calibrating a 3D printer.
For your first calibration, you will start by taking some measurements with your digital calipers. This is a huge time saver compared to doing test prints to measure changes to your calibration. Testing even a small change can take more than an hour plus you waste materials that you do not need to be using up just for calibration. Lay your calipers down flat on each axis. Make sure your calipers are set at zero at the beginning to ensure that the measurements you take are easy to read. Use the controls in your software to squeeze the calipers shut. While doing this take note of how far the printer has moved along the axis. Conduct this process over the maximum length that you can manage; this will make it easier to detect any errors. Write down your measurements (or make some other kind of note so that you do not forget the number).
The idea of calibrating a 3D printer can be different for every machine but the difference you get between how far your machine should have moved and how far it did move will tell you how much you need to adjust your settings by. So, if you wanted it to move 50mm and it only moved 48.67mm you will easily be able to identify your error rate. Now you will want to open the configuration.h file of your firmware and look for a line that reads “#define DEFAULT_AXIS_STEPS_PER_UNIT” (or something extremely like that) followed by a different line with a series of numbers. The numbers on the second line will vary from machine to machine. Each figure represents the number of steps that the stepper needs to make to move the axis by one millimeter (so there will be one number for each axis). To recalibrate your machine, use the following equation:
NewSteps = (AnticipatedMeasurement/RealMeasurement) x OldSteps
So, say that the old number we found in the file for our first measurement was 59.42365781598452. Our equation would look like this:
NewSteps = (50/48.67) x 59.42365781598452
NewSteps = 61.047521898484199712348469282926
Do the math
Replace the OldSteps number with the NewSteps number that you have calculated. Repeat this process for each axis and then upload the modified firmware. Make sure that you label which number goes with which axis when you are writing your figures down. It is very annoying to have to redo this entire process because you got your numbers mixed up. After you have made these modifications perform a test printing to make sure that everything is working as it should. So long as you have done your math correctly, input the new figures into the correct spots and uploaded the modified firmware successfully your 3D printer should now be calibrated properly, with each axis printing your projects with pinpoint accuracy. Calibrating a 3D printer shouldn’t scare you but it is a necessary step in understanding and starting out of in the world of 3d printing.
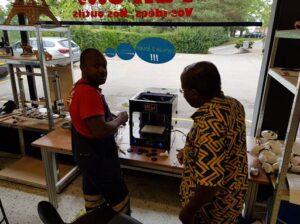
In our MIY MakerSpace over the years, we have had a lot of clients who have purchased a machine from China and had no idea how to calibrate it. In Fribourg our shop is open to the public and we invite our clients in with their CNC machines and 3D printers so that we can look at them together and learn how to calibrate each specific model differently. If this is your case, contact us through our contact form on our contact page or give us a call on our phone number directly. We can make an appointment where you can come in with your 3D printer and your software and your computer and together, we can learn how to calibrate your 3D printer.